前言 機器人要在環境中隨心所欲移動,需要的最基礎功能之一就是避障。要能夠避障的首要條件是要有感測器接收環境中的資訊,才能藉由這個資訊判斷障礙物是否存在。
常見的感測器包含紅外線感測器、超音波感測器、雷射測距儀、一般的相機、RGB-D 感測器等等,底層的感測器 driver 不在這篇文章的討論範圍裡,我們先單純看看怎麼使用收到的 laser data 來避障。
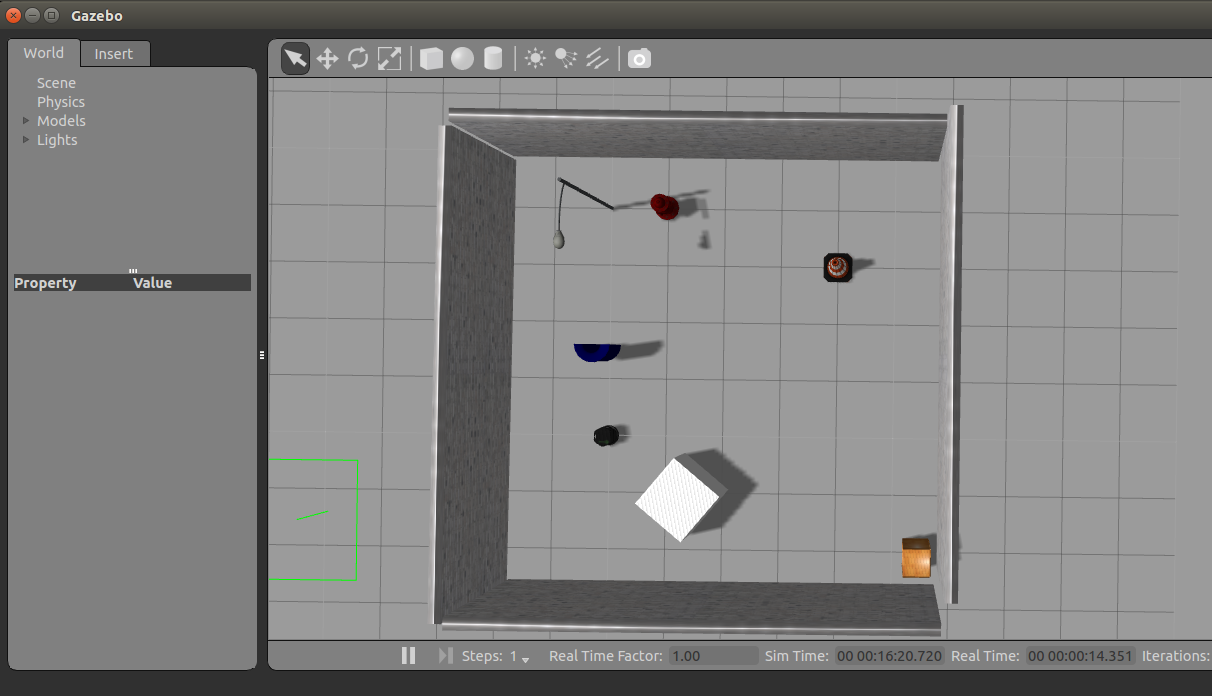
建立模擬環境 我們先用 Gazebo 建立一個簡單的環境,加上幾個障礙物,就可以把這個 world 存起來了 (這邊先叫做 simple_wall.world )。接下來我們要寫一個 launch 檔,在啟動 Gazebo 的時候就載入剛剛存的 world,加入一隻 Turtlebot,並讓這隻 Turtlebot 有一顆模擬的雷射測距儀。相關的檔案都可以在這邊 找到。
而上面提到的這些東西都可以用一個 launch 檔搞定:
1 2 3 4 5 6 7 8 9 10 11 12 13 14 15 16 17 18 19 20 21 22 23 24 25 26 27 28 29 30 31 32 33 34 35 36 <launch > <param name ="robot_description" command ="$(find xacro)/xacro.py '$(find turtlebot_description)/robots/kobuki_hexagons_kinect.urdf.xacro'" /> <arg name ="world_file" default ="$(find assignment_3)/world/simple_wall.world" /> <arg name ="base" value ="$(optenv TURTLEBOT_BASE kobuki)" /> <arg name ="battery" value ="$(optenv TURTLEBOT_BATTERY /proc/acpi/battery/BAT0)" /> <arg name ="gui" default ="true" /> <arg name ="stacks" value ="$(optenv TURTLEBOT_STACKS hexagons)" /> <arg name ="3d_sensor" value ="$(optenv TURTLEBOT_3D_SENSOR kinect)" /> <include file ="$(find gazebo_ros)/launch/empty_world.launch" > <arg name ="use_sim_time" value ="true" /> <arg name ="debug" value ="false" /> <arg name ="gui" value ="$(arg gui)" /> <arg name ="world_name" value ="$(arg world_file)" /> </include > <node name ="spawn_turtlebot_model" pkg ="gazebo_ros" type ="spawn_model" args ="$(optenv ROBOT_INITIAL_POSE) -unpause -urdf -param robot_description -model turtlebot" respawn ="false" output ="screen" /> <node pkg ="robot_state_publisher" type ="robot_state_publisher" name ="robot_state_publisher" > <param name ="publish_frequency" type ="double" value ="30.0" /> </node > <node pkg ="nodelet" type ="nodelet" name ="laserscan_nodelet_manager" args ="manager" /> <node pkg ="nodelet" type ="nodelet" name ="depthimage_to_laserscan" args ="load depthimage_to_laserscan/DepthImageToLaserScanNodelet laserscan_nodelet_manager" > <param name ="scan_height" value ="10" /> <param name ="output_frame_id" value ="/camera_depth_frame" /> <param name ="range_min" value ="0.45" /> <remap from ="image" to ="/camera/depth/image_raw" /> <remap from ="scan" to ="/scan" /> </node > </launch >
啟動之後的模擬環境如下:
實作避障演算法 有了模擬環境跟機器人後,接下來就是要實作控制機器人行為的演算法啦。這邊用到的演算法很簡單,程式碼也就不長:
1 2 3 4 5 6 7 8 9 10 11 12 13 14 15 16 17 18 19 20 21 22 23 24 25 26 27 28 29 30 31 32 33 34 35 36 37 38 39 40 41 42 43 44 45 46 import rospyfrom geometry_msgs.msg import Twistfrom sensor_msgs.msg import LaserScanranges = [] def callback (data ): global ranges ranges = data.ranges def random_walker (): pub = rospy.Publisher('/mobile_base/commands/velocity' , Twist, queue_size=10 ) sub = rospy.Subscriber('/scan' , LaserScan, callback) rospy.init_node('turtlebot_random_exploration_node' ) rate = rospy.Rate(10 ) cmd = Twist() while not rospy.is_shutdown(): global ranges distance_smaller_than_thres = [i for i in ranges if i <= 0.5 ] if ( len (distance_smaller_than_thres) > 0 ): cmd.linear.x = 0 cmd.angular.z = 0.5 pub.publish(cmd) rate = rospy.Rate(1 ) rate.sleep() else : cmd.linear.x = 0.1 cmd.angular.z = 0 pub.publish(cmd) rate = rospy.Rate(10 ) rate.sleep() if __name__ == '__main__' : try : random_walker() except rospy.ROSInterruptException: pass
主要控制機器人移動的函式是 random_walker() ,一進入這個函式,就會先初始化送出移動命令的 publisher ,也會初始化接收 laser data 的 subscriber,只要一收到新的 laser data 就會呼叫 callback() 函式更新 range 這個全域變數,這邊就要稍微解釋一下 LaserScan 這個 msg 了。
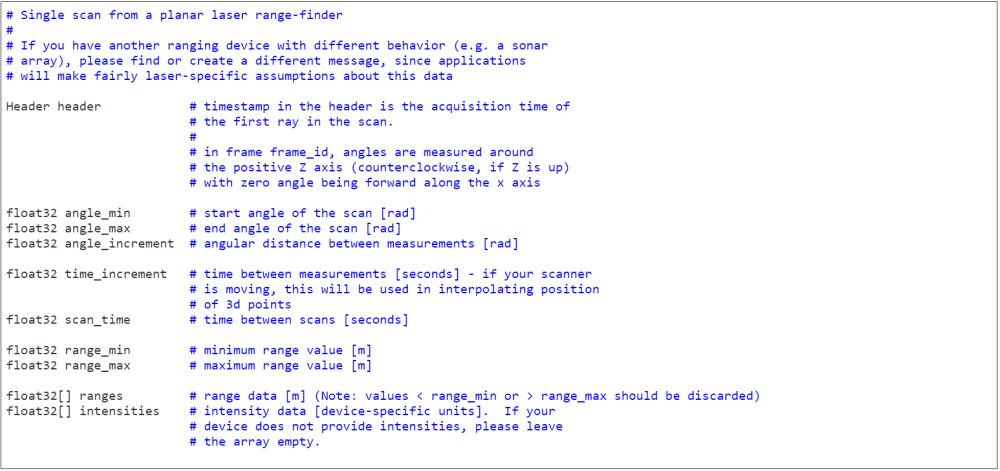
基本上,因為 LaserScan 這種資料結構太常用,所以 ROS 官方提供的 sensor_msgs package 裡面就已經包含了 LaserScan.msg,它的定義在網路上很容易找到:
可以看到裡面包含了許多資訊,例如收到 data 的最小角度和最大角度、回傳得到的距離資訊等等,我們這邊只單純用到距離資訊,所以只用到 ranges 的資料就夠了。
所以在 random_walker() 的 while 迴圈裡面,就是不斷地去判斷 ranges 裡面的距離有沒有小於 0.5 公尺的,如果有,就讓機器人停下來原地旋轉;如果沒有,那就讓機器人繼續往前進。夠簡單了吧。
要執行的話,因為我剛好已經有一個現成的 repository 可以用,所以可以直接載來玩:
1
2
3
4
5
cd catkin_ws/src git clone https://github.com/Po-Jen/sd-ros-class.git cd .. & catkin_make source devel/setup.bash roslaunch assignment3 gazebo_random_walker_and_gmapping.launch
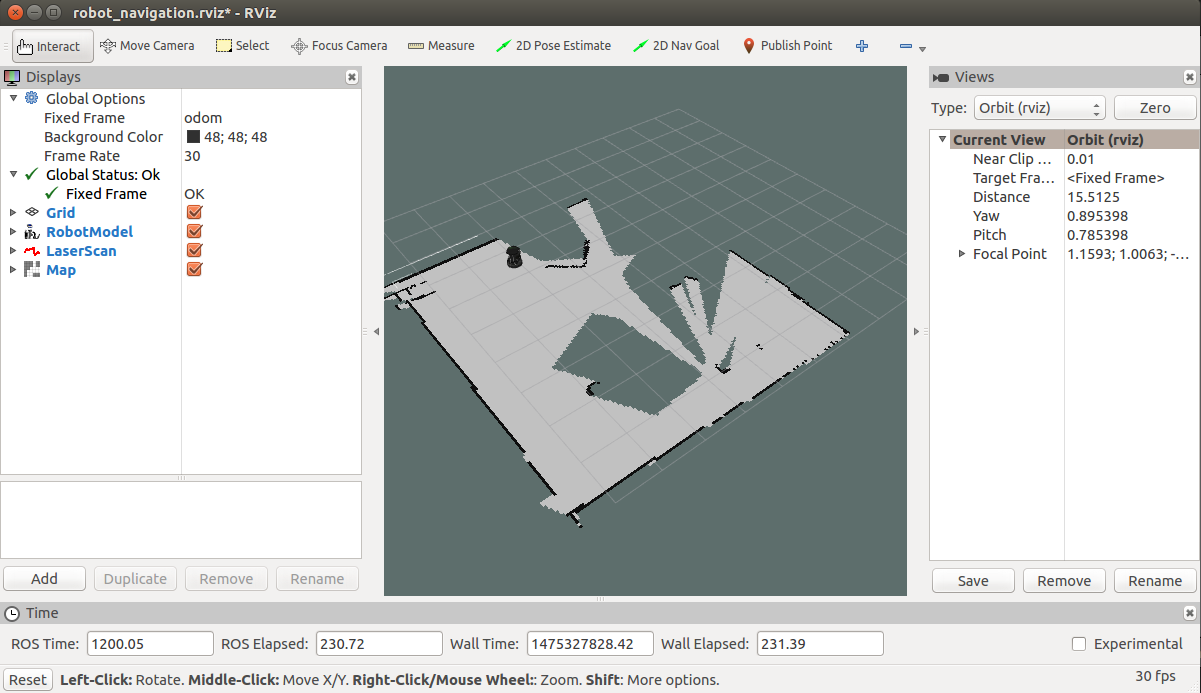
如果你成功跑起來,應該可以看到 Turtlebot 在 Gazebo 裡面緩慢地移動。我還順便加上了 gmapping 的 node,所以應該可以在 Rviz 看到建立出來的地圖。
總結 這周教大家寫一個簡單的避障機器人,可以根據 laser data 判斷機器人附近有沒有障礙物,只要障礙物太過靠近就停下來轉個方向,雖然概念很簡單,不過對於入門的讀者來說,要實作出來也是需要思考一下,希望這篇文章可以變成踏腳石,讓想玩移動機器人的讀者可以上手。
延伸閱讀
掃地機器人算法的一些想法和測試 Robot exploration algorithm
關於作者:@pojenlai 演算法工程師,對機器人跟電腦視覺有少許研究,最近在鍛鍊自己的執行力
喜歡我們的文章嗎?歡迎分享按讚給予我們支持和鼓勵!
留言討論