Web Component 實戰
前言
上個月我們介紹過 Web Component,大致上把 Web Component 的相關知識都介紹一輪了,也提供了一些範例,但是並沒有製作出一個完整可用的元件,
因此今天就好好的來實做一個簡易又實用的 Web Component(對我來說很實用啦…),並且將他發佈到 Webcomponent.org 上面。
最後也會說明一下我嘗試將我製作的 webcomponent 與 react 整合的心得。
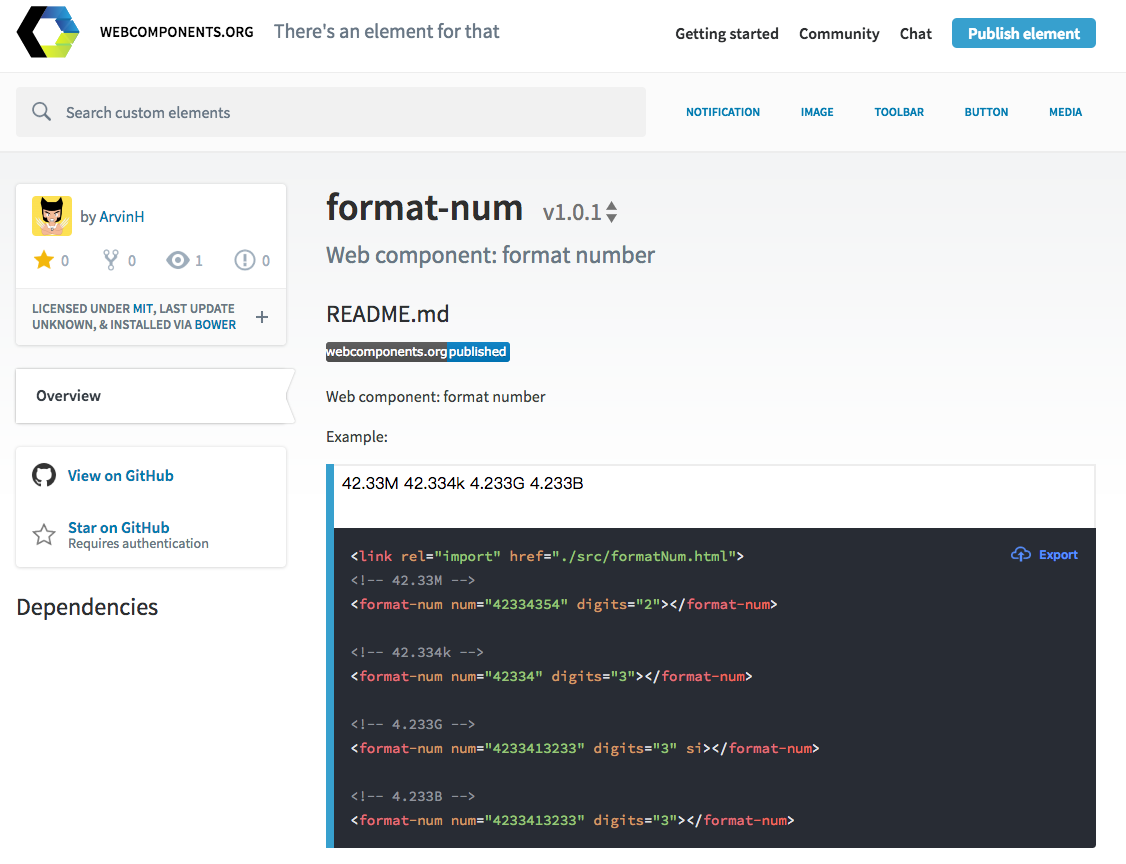
開始前還是先給大家看一下看完這篇文章後可以達到的成果,發佈到 Webcomponent.org 並有 inline demo:
Idea
在一些活動頁面或是互動性較高的網站中,顯示參與人數是很常見的功能,而有些時候我們並不需要很確切的數目,反倒是希望能夠約分成以 K(千) 或 M(百萬) 為單位,
這時通常我會寫個類似下面這樣的小函式來作轉換,並在每個需要的 React Component 中去 require 這個函式使用:
1 | function formatNumber(num) { |
但就只是個很簡單的函示,卻每個需要的 Component 都要 require 一次,久了就會覺得怎麼 HTML 5 不出一個 tag 是可以幫我把數字直接做 format 的呢?
這樣我就只要用對 Tag,就會有我要的結果了,也不用特別去寫個小 function。
想到這就覺得似乎是個好機會來練習一下 Web Comopnent 的實作,而且依照 React 的官方說法 Web Component 跟 React 是可以相互在對方的環境下使用的!
那還等什麼呢!
那就來實作吧
根據上一次的學習 2017,讓我們再來看看 Web Components 吧!,
很快的就能建立好基本的架構:
1 | <!-- template --> |
接著我開始構想這個 tag 需要有哪些 attribute 可以設置,最基本我會需要能指定小數點後的位數,並且能指定轉換單位的型態,因為有時候可能會需要二進位的轉換,也就是以 1024 為單位,而有時需要計算人數時,則是以 K, M, B 來顯示。
因此會需要設置兩個 attribute,digits 與 si:
1 | static get observedAttributes() { |
記得要設置 observedAttributes,這樣使用者改變 tag 的 digits 與 si 時,我們才可以有對應動作,也就是重新 format 一次數字。
接著加入下列兩個關鍵 method:
1 | attributeChangedCallback(name, oldValue, newValue) { |
我們在 observedAttributes 中列舉的 attribute 只要有所變動都會觸發 attributeChangedCallback,並且執行 formatNum(),
而 formatNum() 就會從 shadowDOM 中抓出數字,並且從 attribute 中抓出小數點位數以及是哪種單位,經過 format() 的轉換後再將資料塞回 shadowDOM 中。
( format() 就是類似最上方的數字單位轉換函示,不是重點就不列出,有興趣可以到我的 git repo 連結去看)
寫到這邊看起來就大功告成了,嗯,我也這麼覺得。
但是事情就是沒有憨人想得這麼簡單。
當我在 html 裡面加上我新增的 element <format-num digits='1'>1234</format-num> 時,竟然毫無反應,就只是個 1234,而不是 1.2k。
原因是我以為在執行 formatNum() 的時候,可以從 this.shadowDOM.querySelector('slot').textContent 裡面取得 slot 內的值的,
但似乎無法直接這樣做,就算能透過 shadowDOM 存取,當我們想要將 format 過的數字塞回 tag 內的時候,由於原先的 1234 屬於 light DOM,我們需要透過 document.querySelect('format-num').innerHML 的方式去改值,這樣變成由外部的 context(document) 來更改 light DOM,似乎有點不符 web component 的精神,應該要讓一切操作保持在內部才對。
因此換個方式,我們不讓使用者將值寫在 slot 中,而是透過 attribute 來設置,而我們再將 parse 過的結果利用 shadowDOM 設置到 slot 中,這樣就能順利顯示了!
修改程式如下:
1 | // 增加 num attribute |
成果:
讓別人 Import 你的 Webcomponent
本來想說做完了,準備要發佈的時候,發現需要準備 Demo page,
雖然我都直接在 jsbin 與 codepen 上方寫,還沒有真正在別的 page Import 過 webcomponent,但想說應該就很簡單啊,把我的 code 都放在一個 html 內,
然後透過 <link rel="import" href="../src/formatNum.html"> 不就得了?
正當我這麼想的時候,卻發現我的 demo page 一直無法正常顯示,出現 “Uncaught TypeError: Cannot read property ‘content’ of null” 的 error,
是在 custom element constructor 的地方:
1 | const t = document.querySelector('#format-num-template'); |
竟然找不到我的 template ?!
仔細研究了好一陣子後才發現到這篇文章 introduction to html imports
裡面有提到 html import 時的行為差異,舉例來說:
index.html
1 | <link rel="import" href="formatNum.html"> // 1. |
formatNum.html
1 | <script src="js/script1.js"></script> // 2. |
以上面的例子來說明,index.html 載入 formatNum.html,其 script 的執行順序如上面標記,
但 index.html 與 formatNum.html 中的 document 物件卻都是指向 index.html。
因此當我的 demo page 在執行存在於 formatNum.html 內的 script,也就是 constructor 時,document 就找不到存在於 formatNum.html 內的 template 了。
所以該怎麼解決呢?
為了要保存住 formatNum.html 自己的 document object,我們可以這樣做:
1 | documentCurrentScript = document._currentScript || document.currentScript; |
currentScript 是只有在有支援 HTML import 的瀏覽器中才有的屬性,若是透過 webcomponent.js 等 polyfill,則是用 _currentScript
打包發佈
問題都解決以後當然就要發佈到 Webcomponent.org 上面去了
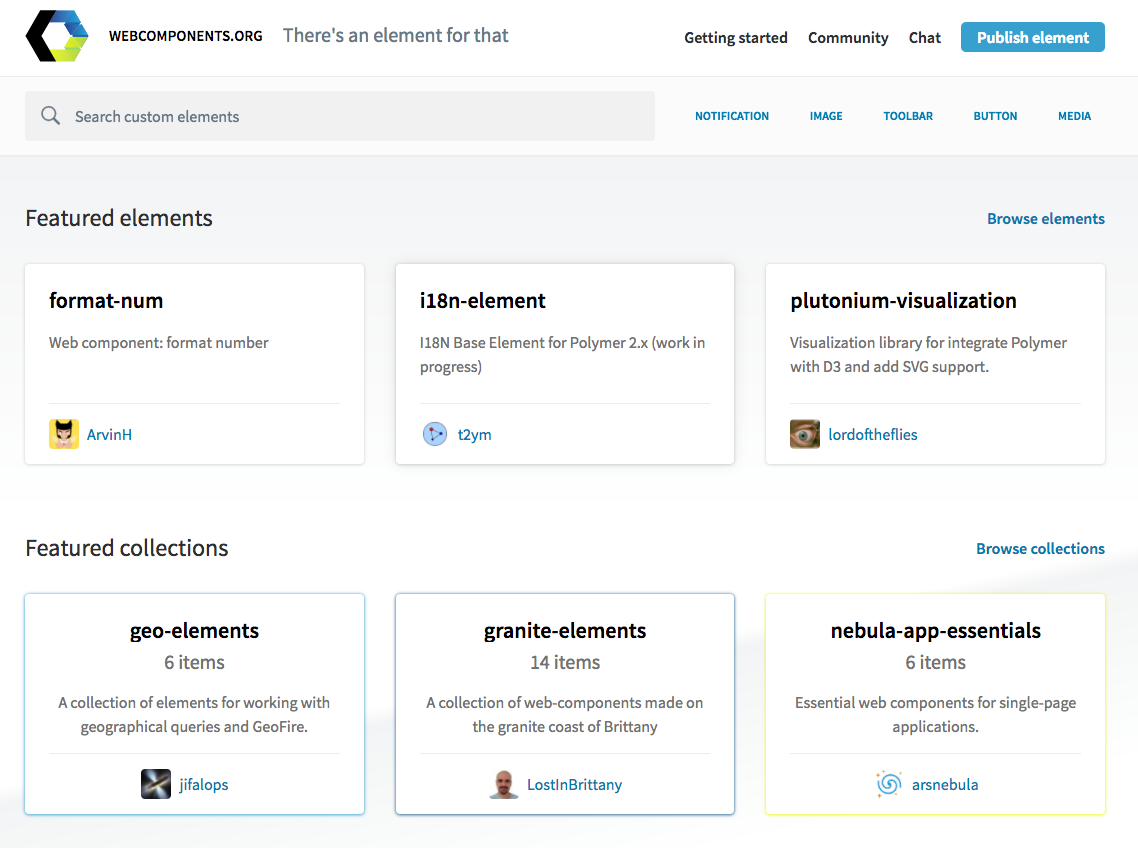
從網站上的步驟看來很簡單,只要你的 repository 滿足三個條件,並加上 badge 與 inline demo,就可以發佈了:
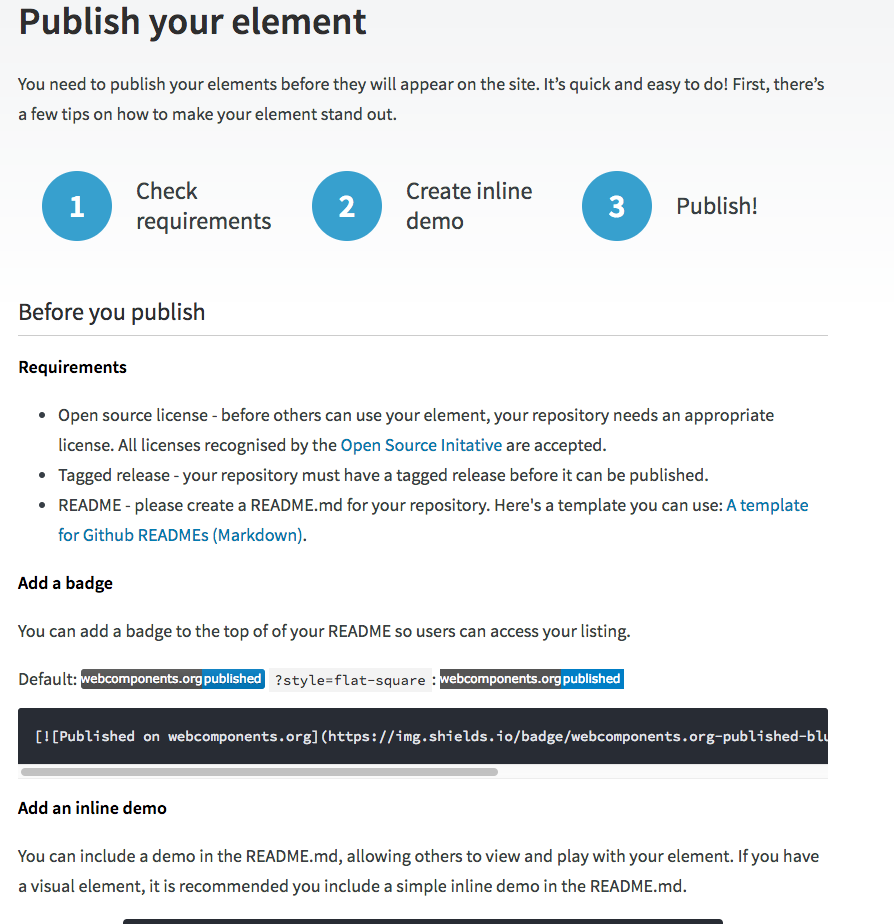
三個條件:
有 Open source license,只要是被 Open Source Initative 認可的都可以。
Tagged release,這點很重要,他會依照你 repository 裡面的 tag 去抓檔案,如果你沒有設置的話,就算 repo 中有程式,也會發佈失敗,而且如果你有更新,也一定要有新版 Tag release,Webcomponent.org 這邊才會更新。我一開始因為有些設定沒做好,重新 push 後忘了 release tage,怎麼樣都是發佈失敗…
README,這當然也是很重要,你總得要介紹一下內容。此外,如果你想要放 inline demo 的話,也是要設置在 README.md 當中。
加上 badge:
1 | [![Published on webcomponents.org][webcomponents-image]][webcomponents-url] |
Inline Demo:
要製作 inline demo 很簡單,只要在你的 README.md 中加入:
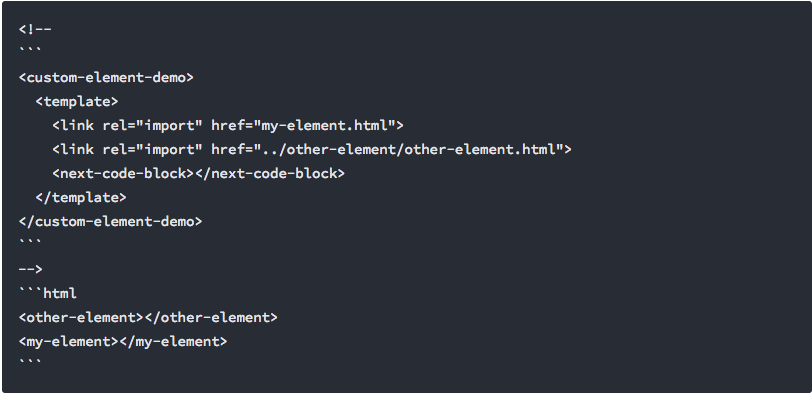
你只需要在 <custom-element-demo> 中 import 你的 custom-element 即可,html block 內的就是你 demo 元件的地方了。
以我的 README.md 來說,完成後會長這樣:
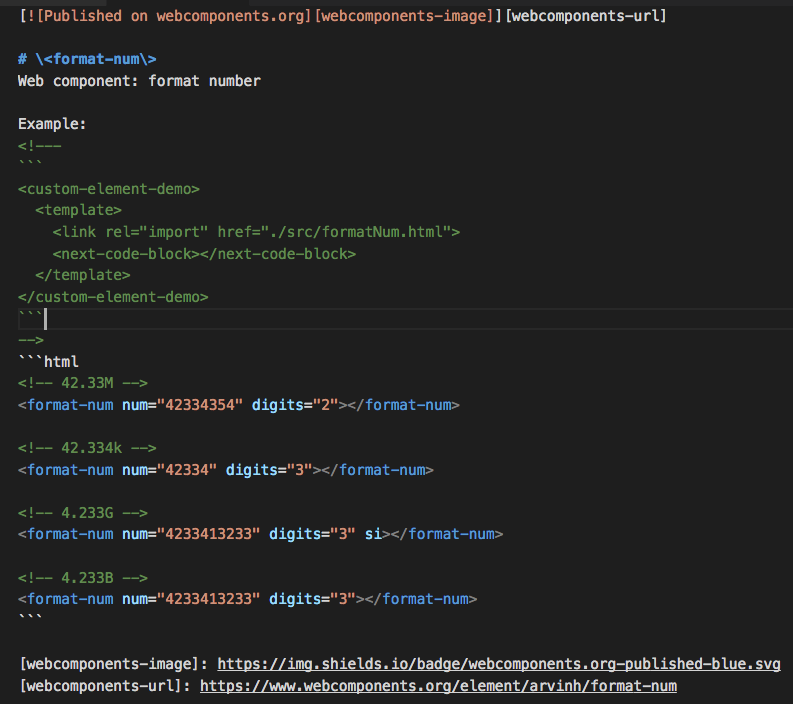
當你照著網站上所寫的,完成所有步驟後,可以到這邊去填寫 Repo 名稱並進行發佈。
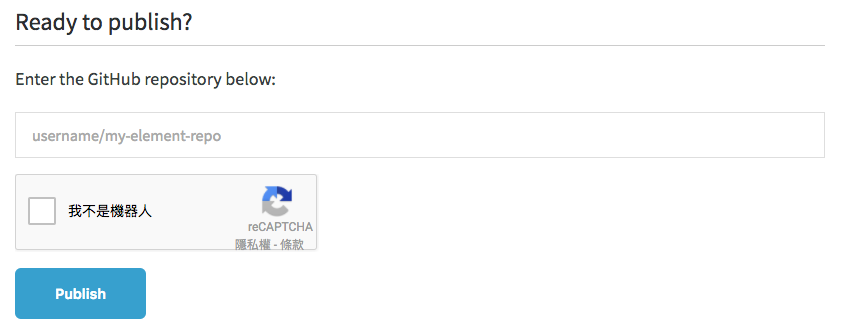
然後你會發現發佈失敗,因為網站隱藏了一個步驟沒有寫到。
他會要求你的 repo 中要含有 bower.json,但應該是沒有要你 register 到 bower 中,不過我有順手放上去就是了,
所以也能透過 bower install format-num 來下載這個 webcomponent。
總之,加上 bower.json 以後應該就能順利發佈了!
此外,你也可以到 https://www.webcomponents.org/preview 輸入你的 git repo url,就可以在發佈前先進行 preview,
在這邊甚至能動態調整你的 inline demo!就由讀者自行玩玩吧!
Work with React but failed
製作這個 Web Component 的初衷是希望能夠透過它讓我輕鬆地放在 React 的 component 中當一般 tag 使用,因此我也嘗試了一下簡單的範例:
See the Pen web-component:
但眼尖的讀者會發現,我在 html 內又再寫了一次 template…
沒錯,因為再度遇到 document 存取不到 template 的 error,這次連使用 currentScript 都無法解決,我想是跟 Rect compile 的時間以及 Webcomponent script 載入執行的時間順序有關,導致存取不到正確的 document scope。
當然這也只是我的猜測,若有讀者了解原因請不吝指教!
在試著整合 React 的過程中也有發現,babel 在處理 extends HTMLElement 的元件上有些衝突,需要透過 babel-plugin-transform-custom-element-classes 來解,不過沒有真正試過,畢竟我會希望 webcomponent 是獨立的,
不需要跟 React 一起經過 babel 的 compile,而在支援 webcomponent 的 browser 上,理論上也不需要 babel 編譯 es6 的 code 才對…
結論
雖然最後還是沒能順利整合進 React 當中,不過原先預期輕鬆完成的小玩具竟然還是卡了不少關,也有學習到,不過總是因為時間有限沒辦法很完整的將查到的資料認真讀完,
或許我的實作過程與觀念的理解有錯誤的地方,歡迎讀者留言指教,我會非常感激的!
資料來源
關於作者:
@arvinh 前端攻城獅,熱愛數據分析和資訊視覺化

留言討論