使用 Python 和 PyGame 遊戲製作入門教學

Posted by KD Chang on 2019-10-19

使用 Python 和 PyGame 遊戲製作入門教學

前言

隨著天氣越來越冷,很多人卻納悶蚊子為何不減反增。身為一個工程師若沒辦法成功在現實社會和蚊子好好相處,只好做打蚊子遊戲調劑身心(咦)。本文將透過一個打蚊子遊戲,帶領讀者學習如何使用 Python 的 PyGame 模組製作一個簡單的打蚊子遊戲,在學習遊戲開發的基本觀念的同時,也讓我們在虛擬社會中可以彌補現實社會中的遺憾(喂)。好啦,就讓我們開始 PyGame 遊戲開發之旅吧!

PyGame 初體驗

PyGame 是一種 Python 用來製作遊戲的模組,它能讓開發者可以用更簡單的方式加入文字、圖案、聲音等元素並進行事件處理來開發遊戲。我們可以看到 PyGame 官方網站上有許多有趣的網友製作的有趣遊戲

首先,我們先來進行環境設定,先確保你的作業系統有安裝 Python3,我們這邊使用的是 MacOS 作業系統。然後安裝我們的 pygame 模組。

$ pip install pygame

在開始 PyGame Hello World 之前我們先來認識 PyGame 幾大核心元素:

  1. pygame.Surface:Surface 資料型別,代表一個矩形的影像,用來繪製在螢幕上
  2. pygame.Rect:Rect 資料型別,用來定位矩形空間的位置和可以用來偵測物件是否碰撞的
  3. pygame.event:事件模組,用來處理使用者觸發事件,包含自定義事件
  4. pygame.font:文字模組,用來顯示文字,可用來顯示儀表板資料
  5. pygame.draw:繪圖模組,可以畫出多邊形圖形,可當作背景物件
  6. pygame.image:圖片模組,用來處理載入圖片等相關操作,可當作角色精靈(sprite)
  7. pygame.time:時間模組,包含控制遊戲迴圈迭代速率,確保反饋不會太快消逝

接著我們直接使用 PyGame 製作一個 hello world 畫面,這樣讀者可以更清楚整個設計的架構:

import sys

import pygame
from pygame.locals import QUIT

# 初始化
pygame.init()
# 建立 window 視窗畫布,大小為 800x600
window_surface = pygame.display.set_mode((800, 600))
# 設置視窗標題為 Hello World:)
pygame.display.set_caption('Hello World:)')
# 清除畫面並填滿背景色
window_surface.fill((255, 255, 255))

# 宣告 font 文字物件
head_font = pygame.font.SysFont(None, 60)
# 渲染方法會回傳 surface 物件
text_surface = head_font.render('Hello World!', True, (0, 0, 0))
# blit 用來把其他元素渲染到另外一個 surface 上,這邊是 window 視窗
window_surface.blit(text_surface, (10, 10))

# 更新畫面,等所有操作完成後一次更新(若沒更新,則元素不會出現)
pygame.display.update()

# 事件迴圈監聽事件,進行事件處理
while True:
    # 迭代整個事件迴圈,若有符合事件則對應處理
    for event in pygame.event.get():
        # 當使用者結束視窗,程式也結束
        if event.type == QUIT:
            pygame.quit()
            sys.exit()

成果如下:

使用 Python 和 PyGame 遊戲製作入門教學

開始製作打蚊子小遊戲

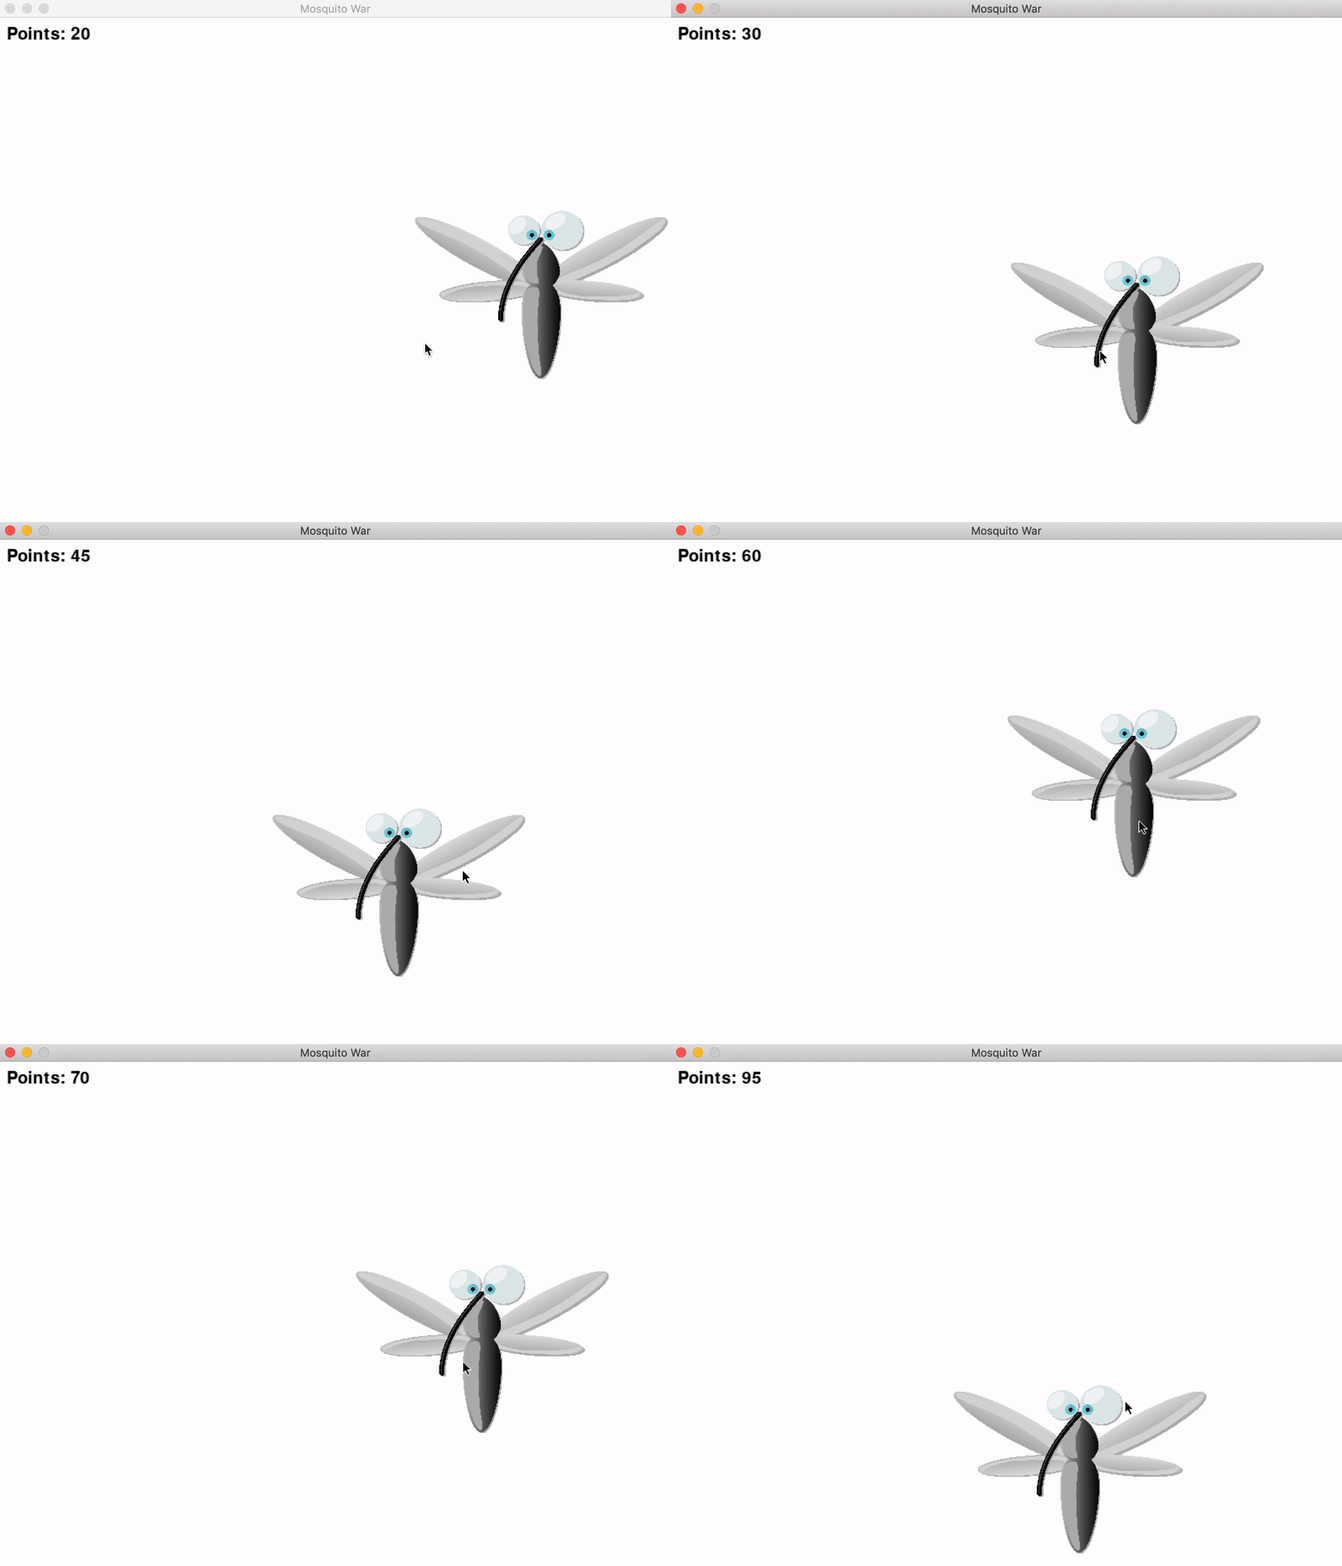
在開始正式製作我們的遊戲前我們先來看個遊戲成果動畫:
使用 Python 和 PyGame 遊戲製作入門教學

通常我們在設計遊戲之前我們會定義一下遊戲規則,而我們的打蚊子遊戲規則十分簡單,就是打蚊子,打到一隻加五分,遊戲不會結束(喂)。以下定義一下會用到的核心設計:

  1. 左上方設有遊戲儀表板顯示目前分數
  2. 中間畫面有一隻大蚊子每 3 秒會換位置
  3. 當打到蚊子時會加五分,顯示 hit!! 在左上

使用 Python 和 PyGame 遊戲製作入門教學

建立 Mosquito 類別(繼承 pygame.sprite.Sprite),讓我們可以生產蚊子物件(由於我們需要判斷是否使用者的滑鼠有點擊到物件,所以需要透過 rect 來定位):

class Mosquito(pygame.sprite.Sprite):
    def __init__(self, width, height, random_x, random_y, widow_width, window_height):
        super().__init__()
        # 載入圖片
        self.raw_image = pygame.image.load('./mosquito.png').convert_alpha()
        # 縮小圖片
        self.image = pygame.transform.scale(self.raw_image, (width, height))
        # 回傳位置
        self.rect = self.image.get_rect()
        # 定位
        self.rect.topleft = (random_x, random_y)
        self.width = width
        self.height = height
        self.widow_width = widow_width
        self.window_height = window_height

事件迴圈(其中我們主要偵測 MOUSEBUTTONDOWNreload_mosquito_event 自定義事件):

while True:
    # 偵測事件
    for event in pygame.event.get():
        if event.type == QUIT:
            pygame.quit()
            sys.exit()
        elif event.type == reload_mosquito_event:
            # 偵測到重新整理事件,固定時間移除蚊子,換新位置
            mosquito.kill()
            # 蚊子新位置
            random_x, random_y = get_random_position(WINDOW_WIDTH, WINDOW_HEIGHT, IMAGEWIDTH, IMAGEHEIGHT)
            mosquito = Mosquito(IMAGEWIDTH, IMAGEHEIGHT, random_x, random_y, WINDOW_WIDTH, WINDOW_HEIGHT)
        elif event.type == MOUSEBUTTONDOWN:
            # 當使用者點擊滑鼠時,檢查是否滑鼠位置 x, y 有在蚊子圖片上,若有殺死蚊子並加分
            if random_x < pygame.mouse.get_pos()[0] < random_x + IMAGEWIDTH and random_y < pygame.mouse.get_pos()[1] < random_y + IMAGEHEIGHT:
                mosquito.kill()
                random_x, random_y = get_random_position(WINDOW_WIDTH, WINDOW_HEIGHT, IMAGEWIDTH, IMAGEHEIGHT)
                mosquito = Mosquito(IMAGEWIDTH, IMAGEHEIGHT, random_x, random_y, WINDOW_WIDTH, WINDOW_HEIGHT)
                hit_text_surface = my_hit_font.render('Hit!!', True, (0, 0, 0))
                points += 5

    # 背景顏色,清除畫面
    window_surface.fill(WHITE)

    # 遊戲分數儀表板
    text_surface = my_font.render('Points: {}'.format(points), True, (0, 0, 0))
    window_surface.blit(mosquito.image, mosquito.rect)
    window_surface.blit(text_surface, (10, 0))

    if hit_text_surface:
        window_surface.blit(hit_text_surface, (10, 10))
        hit_text_surface = None

    pygame.display.update()
    main_clock.tick(FPS)

隨機產生位置:

def get_random_position(widow_width, window_height, image_width, image_height):
    random_x = random.randint(image_width, widow_width - image_width)
    random_y = random.randint(image_height, window_height - image_height)

    return random_x, random_y

完整程式碼如下:

import sys, time
import random

import pygame
from pygame.locals import Color, QUIT, MOUSEBUTTONDOWN, USEREVENT, USEREVENT

WINDOW_WIDTH = 800
WINDOW_HEIGHT = 600
WHITE = (255, 255, 255)
IMAGEWIDTH = 300
IMAGEHEIGHT = 200
FPS = 60

def get_random_position(widow_width, window_height, image_width, image_height):
    random_x = random.randint(image_width, widow_width - image_width)
    random_y = random.randint(image_height, window_height - image_height)

    return random_x, random_y


# init mosquito random position
class Mosquito(pygame.sprite.Sprite):
    def __init__(self, width, height, random_x, random_y, widow_width, window_height):
        super().__init__()
        self.raw_image = pygame.image.load('./mosquito.png').convert_alpha()
        self.image = pygame.transform.scale(self.raw_image, (width, height))
        self.rect = self.image.get_rect()
        self.rect.topleft = (random_x, random_y)
        self.width = width
        self.height = height
        self.widow_width = widow_width
        self.window_height = window_height

def main():
    pygame.init()

    # load window surface
    window_surface = pygame.display.set_mode((WINDOW_WIDTH, WINDOW_HEIGHT))
    pygame.display.set_caption('Mosquito War')
    random_x, random_y = get_random_position(WINDOW_WIDTH, WINDOW_HEIGHT, IMAGEWIDTH, IMAGEHEIGHT)
    mosquito = Mosquito(IMAGEWIDTH, IMAGEHEIGHT, random_x, random_y, WINDOW_WIDTH, WINDOW_HEIGHT)
    reload_mosquito_event = USEREVENT + 1
    pygame.time.set_timer(reload_mosquito_event, 300)
    points = 0
    my_font = pygame.font.SysFont(None, 30)
    my_hit_font = pygame.font.SysFont(None, 40)
    hit_text_surface = None
    main_clock = pygame.time.Clock()

    while True:
        # 偵測事件
        for event in pygame.event.get():
            if event.type == QUIT:
                pygame.quit()
                sys.exit()
            elif event.type == reload_mosquito_event:
                # 偵測到重新整理事件,固定時間移除蚊子,換新位置
                mosquito.kill()
                # 蚊子新位置
                random_x, random_y = get_random_position(WINDOW_WIDTH, WINDOW_HEIGHT, IMAGEWIDTH, IMAGEHEIGHT)
                mosquito = Mosquito(IMAGEWIDTH, IMAGEHEIGHT, random_x, random_y, WINDOW_WIDTH, WINDOW_HEIGHT)
            elif event.type == MOUSEBUTTONDOWN:
                # 當使用者點擊滑鼠時,檢查是否滑鼠位置 x, y 有在蚊子圖片上
                if random_x < pygame.mouse.get_pos()[0] < random_x + IMAGEWIDTH and random_y < pygame.mouse.get_pos()[1] < random_y + IMAGEHEIGHT:
                    mosquito.kill()
                    random_x, random_y = get_random_position(WINDOW_WIDTH, WINDOW_HEIGHT, IMAGEWIDTH, IMAGEHEIGHT)
                    mosquito = Mosquito(IMAGEWIDTH, IMAGEHEIGHT, random_x, random_y, WINDOW_WIDTH, WINDOW_HEIGHT)
                    hit_text_surface = my_hit_font.render('Hit!!', True, (0, 0, 0))
                    points += 5

        # 背景顏色,清除畫面
        window_surface.fill(WHITE)

        # 遊戲分數儀表板
        text_surface = my_font.render('Points: {}'.format(points), True, (0, 0, 0))
        # 渲染物件
        window_surface.blit(mosquito.image, mosquito.rect)
        window_surface.blit(text_surface, (10, 0))

        # 顯示打中提示文字
        if hit_text_surface:
            window_surface.blit(hit_text_surface, (10, 10))
            hit_text_surface = None

        pygame.display.update()
        # 控制遊戲迴圈迭代速率
        main_clock.tick(FPS)

if __name__ == '__main__':    
    main()

總結

以上就透過一個簡單的打蚊子遊戲來介紹 PyGame 遊戲開發的流程,其中包含了遊戲背景、物件製作以及事件處理等。這個遊戲主要為 demo 使用,尚有很多需要還需要調整改進的地方。相信讀者在學會了相關概念後也迫不及待的想要製作屬於自己的遊戲了吧!或許讀者也可以在下課下班後自己來製作打蟑螂遊戲來調劑身心。我們下回見囉!

參考文件

  1. mosquito 圖片
  2. pygame学习笔记(5)——精灵
  3. pygame 教學

關於作者:
@kdchang 文藝型開發者,夢想是做出人們想用的產品和辦一所心目中理想的學校。A Starter & Maker. JavaScript, Python & Arduino/Android lover.:)


#Python - PyGame - 遊戲製作 - game - 遊戲開發


Related Posts

Angular 9 implement a hover effect with directives

Angular 9 implement a hover effect with directives

npm套件教學

npm套件教學

初心者的計概--SESSION 與 COOKIE

初心者的計概--SESSION 與 COOKIE


Newsletter


Comments