前言
上次講了一些基本的理論介紹,但我們現在是希望學會如何實際寫程式讓機器人動起來,只有純數學的觀念跟機器人好像沒什麼關係,所以這次希望可以開始銜接到一個常用的工具 - Eigen。讓大家有動手實作、開始玩到東西的感覺。
為什麼要會 Eigen?
首先,Eigen 是一個 C++ 的 open source library,提供了許多線性代數運算相關的函式。
然後,我們這一系列是要介紹 LSD-SLAM,所以當然是因為 LSD-SLAM 也使用 Eigen 這個 library 來處理線性代數的運算,你可以在 lsd-slam 的 repository 裡搜尋 eigen,就會看到 以下的結果。
另外,還有許多的工具,例如 g2o、sophus 也都有使用 Eigen,所以了解這個工具算是滿必要的。
安裝與小玩一下 Eigen
安裝滿簡單的,直接用下面這個指令就好:
1
| sudo apt-get install libeigen3-dev
|
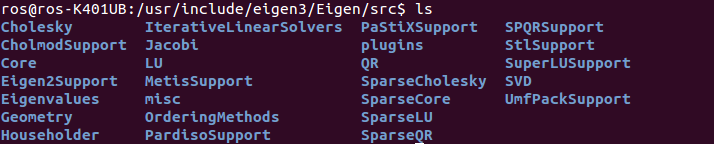
安裝完成之後,你應該可以在 /usr/include/eigen3 裡面找到相關的檔案,如果你進去看一下,就會看到很多酷炫的功能:
接下來就讓我們來寫一個矩陣的小程式,首先先新增一個資料夾,開始寫 code:
1
2
| mkdir test_eigen
vim eigenMatrix.cpp
|
1
2
3
4
5
6
7
8
9
10
11
12
13
14
15
16
17
18
19
20
21
22
23
24
25
| #include <iostream>
using namespace std;
#include <Eigen/Core>
int main( int argc, char** argv )
{
Eigen::Matrix<float, 2, 3> matrix_23;
matrix_23 << 1, 2, 3, 4, 5, 6;
cout << matrix_23 << endl;
for (int i=0; i<2; i++) {
for (int j=0; j<3; j++)
cout<<matrix_23(i,j)<<"\t";
cout<<endl;
}
return 0;
}
|
寫完之後呢,還需要編譯,這邊也推薦大家使用 cmake,畢竟 ROS package 都使用 catkin_make,而 底層其實還是 cmake!
裡面的內容是:
1
2
3
4
5
6
7
8
9
10
11
12
13
| cmake_minimum_required( VERSION 2.8 )
project( eigenMatrix )
set( CMAKE_BUILD_TYPE "Release" )
set( CMAKE_CXX_FLAGS "-O3" )
# Include Eigen headers
include_directories( "/usr/include/eigen3" )
# in osx and brew install
# include_directories( /usr/local/Cellar/eigen/3.3.3/include/eigen3 )
add_executable( eigenMatrix eigenMatrix.cpp )
|
接下來編譯跟執行只需要:
1
2
3
| cmake .
make
./eigenMatrix
|
你應該就可以看到如下的輸出了:
1
2
3
4
5
| ros@ros-K401UB:~/code/eigen$ ./eigenMatrix
1
2
3
4 5 6
1 2 3
4 5 6
|
眼尖的你應該會發現,資料夾裡面多了好多編譯過程中自動產生的文件,有點亂。所以,我們可以開一個 build 資料夾,讓這些中間產物都被放在這個資料夾,如果今天想要砍掉中間產物,砍掉這個資料夾就好了!這種方法會讓編譯過程變成:
1
2
3
4
| mkdir build
cd build
cmake ..
make
|
相信有自己使用過 cmake 的讀者,對上面的步驟一定不陌生!
解線性方程組 & 座標轉換
線性代數也常常被用來解線性方程組或是來做座標轉換,如果你想要試著解看看,請參考這篇 解 least square 方法 跟 Space Transform。
我們再來寫一個小程式來更熟悉 Eigen:
1
2
3
4
5
6
7
8
9
10
11
12
13
14
15
16
17
18
19
20
21
22
23
24
25
26
27
28
29
30
31
32
33
34
35
36
37
38
39
40
41
42
43
44
45
46
47
48
49
50
51
| #include <iostream>
#include <cmath>
using namespace std;
#include <Eigen/Core>
#include <Eigen/Geometry>
int main ( int argc, char** argv )
{
Eigen::Matrix3d rotation_matrix = Eigen::Matrix3d::Identity();
Eigen::AngleAxisd rotation_vector ( M_PI/4, Eigen::Vector3d( 0,0,1 ) );
cout .precision(3);
cout << "rotation matrix =\n" << rotation_vector.matrix() << "\n" << endl;
rotation_matrix = rotation_vector.toRotationMatrix();
Eigen::Vector3d v ( 1,0,0 );
Eigen::Vector3d v_rotated = rotation_vector * v;
cout << "(1,0,0) after rotation = " << v_rotated.transpose() << "\n" << endl;
v_rotated = rotation_matrix * v;
cout << "(1,0,0) after rotation = " << v_rotated.transpose() << "\n" << endl;
Eigen::Vector3d euler_angles = rotation_matrix.eulerAngles ( 2,1,0 );
cout << "yaw pitch roll = " << euler_angles.transpose() << "\n" << endl;
Eigen::Quaterniond q = Eigen::Quaterniond ( rotation_vector );
cout << "quaternion = \n" << q.coeffs() << "\n" << endl;
q = Eigen::Quaterniond ( rotation_matrix );
cout << "quaternion = \n" << q.coeffs() << "\n" << endl;
v_rotated = q*v;
cout << "(1,0,0) after rotation = " << v_rotated.transpose() << "\n" << endl;
return 0;
}
|
你執行成功之後應該可以看到下面的輸出:
1
2
3
4
5
6
7
8
9
10
11
12
13
14
15
16
17
18
19
20
21
22
23
24
| rotation matrix =
0.707 -0.707 0
0.707 0.707 0
0 0 1
(1,0,0) after rotation = 0.707 0.707 0
(1,0,0) after rotation = 0.707 0.707 0
yaw pitch roll = 0.785 -0 0
quaternion =
0
0
0.383
0.924
quaternion =
0
0
0.383
0.924
(1,0,0) after rotation = 0.707 0.707 0
|
總結
這次很簡單地跟大家介紹了 Eigen 這個 library,希望可以讓大家之後看到 Eigen 這個 library 會比較有親切跟熟悉的感覺,我們下回再見!
延伸閱讀
- 高翔大神書中 ch3 的程式碼
- Eigen 的官方 module 列表
- Eigen 的官方 Quick Reference(類似 cheatsheet)
關於作者:
@pojenlai 演算法工程師,對機器人跟電腦視覺有少許研究,最近在鍛鍊自己的執行力
喜歡我們的文章嗎?歡迎分享按讚給予我們支持和鼓勵!
留言討論